PostgreSQL
PostgreSQL is a popular open-source relational database management system. It is widely used in web applications and backend systems.
ShipAny supports PostgreSQL. Follow the steps below to get started quickly.
Quick Start
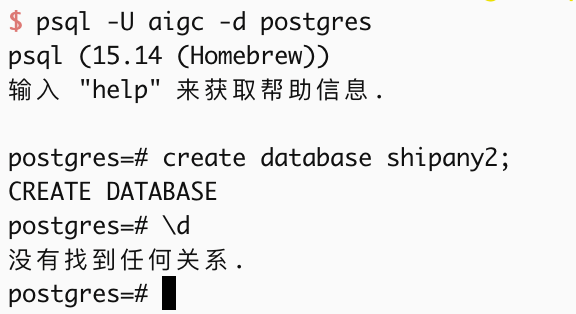
Install PostgreSQL for your operating system (search and follow the appropriate installation guide), then create a database from the command line:
Alternatively, you can use a managed PostgreSQL database service provided by cloud vendors.
For the database you created in the previous step, you need to set up a username and password, grant permissions, enable remote access, etc.
The database connection string DATABASE_URL looks like this:
postgresql://user:password@host:port/databaseUse the following command to test whether the connection works:
psql "postgresql://user:password@host:port/database"In your project environment variable files, fill in the PostgreSQL-related configuration.
- Local development:
.env.development - Production:
.env.production
DATABASE_PROVIDER = "postgresql"
DATABASE_URL = "postgresql-database-url"
DB_SCHEMA_FILE = "./src/config/db/schema.postgres.ts"
DB_MIGRATIONS_OUT = "./src/config/db/migrations"- DATABASE_PROVIDER: Required. Fixed value
postgresql - DATABASE_URL: Required. Your PostgreSQL database
Database URL - DB_SCHEMA_FILE: Required. Fixed value
./src/config/db/schema.postgres.ts - DB_MIGRATIONS_OUT: Optional. Output path for migration files. Default is
./src/config/db/migrations. You can choose different output paths based on database type.
Using PostgreSQL database, the data table structure is defined in the ./src/config/db/schema.postgres.ts file, you need to export the data table from this file.
Open ./src/config/db/schema.ts file, modify the content to:
export * from './schema.postgres';Run the following commands to migrate your database tables:
pnpm db:generate
pnpm db:migrateYou can manage the database in your PostgreSQL admin console, or run the following command locally:
pnpm db:studioThis will open the database admin panel.
Customization
Update tables
If you need to add new tables or modify table columns, edit ./src/config/db/schema.postgres.ts to update the schema.
After making changes, run the following commands to generate and apply migrations:
pnpm db:generate
pnpm db:migrate
Update database connection
If you need to adjust connection parameters (e.g., custom options, connection pooling, etc.), update the logic in ./src/core/db/postgres.ts.
By default, data operations use the db() instance exported from ./src/core/db/index.ts. Its return type is any, so in some cases you may not get good type hints.
import { db } from '@/core/db';
import { user } from '@/config/db/schema';

const [result] = await db().select().from(user).limit(1);
If you want a strongly typed database instance, you can use the following approaches when operating on data:
import { dbPostgres } from '@/core/db';
import { user } from '@/config/db/schema';

const [result] = await dbPostgres().select().from(user).limit(1);
Or:
import { getPostgresDb } from '@/core/db/postgres';
import { user } from '@/config/db/schema';

const [result] = await getPostgresDb().select().from(user).limit(1);
Deploy to Cloudflare Workers
When deploying the project on Cloudflare Workers, using PostgreSQL is not supported yet.
You can use a PostgreSQL-compatible database service such as Supabase, Neon.
Isolate data through Schema
PostgreSQL uses public as the default Schema. In the same PostgreSQL database, you can create multiple Schemas to store data for multiple different projects.
Login to the PostgreSQL database using the command:
psql "postgresql://user:password@host:port/database"For example, create a Schema named project_2, the command to create a custom Schema is as follows:
CREATE SCHEMA project_2;In the environment variable file of the new project, fill in the configuration related to the PostgreSQL database.
- Local development environment variable file:
.env.development - Production environment variable file:
.env.production
# postgresql
DATABASE_PROVIDER = "postgresql"
DATABASE_URL = "postgresql://user:password@host:port/database"

DB_SCHEMA_FILE = "./src/config/db/schema.postgres.ts"
DB_MIGRATIONS_OUT = "./src/config/db/migrations_project_2"
DB_SCHEMA = "project_2"
DB_MIGRATIONS_SCHEMA = "project_2"
DB_MIGRATIONS_TABLE = "__drizzle_migrations"- DATABASE_PROVIDER: Required. Fixed value
postgresql - DATABASE_URL: Required. Your PostgreSQL database
DATABASE_URL - DB_SCHEMA_FILE: Required. Fixed value
./src/config/db/schema.postgres.ts - DB_MIGRATIONS_OUT: Optional. Output path for migration files. Default is
./src/config/db/migrations. You can choose different output paths based on database type and project name. - DB_SCHEMA: Optional. Database Schema name. Default is
public. Enter the Schema name of the new project to isolate data. - DB_MIGRATIONS_SCHEMA: Optional. Database migration Schema name. Default is
drizzle. Enter the Schema name of the new project to isolate data. - DB_MIGRATIONS_TABLE: Optional. Database migration table name. Default is
__drizzle_migrations. Can be kept unchanged.
Run the following commands to generate and apply migrations:
pnpm db:generate
pnpm db:migrateYou can login to the PostgreSQL database using the command:
psql "postgresql://user:password@host:port/database"Switch to the new project's Schema, manage data.
SET search_path TO project_2;You can run the following command locally:
pnpm db:studioThis will open the database admin panel, switch to the new project's Schema, and manage the tables.