Crisp
ShipAny integrates with Crisp customer service system. With simple configuration, you can integrate the web chat widget into your website.
Quick Start
Follow the steps below to quickly integrate the Crisp chat widget into your website.
Visit the Crisp website and register an account.
Go to the Crisp dashboard and add the domain of the website where you want to integrate the chat widget.
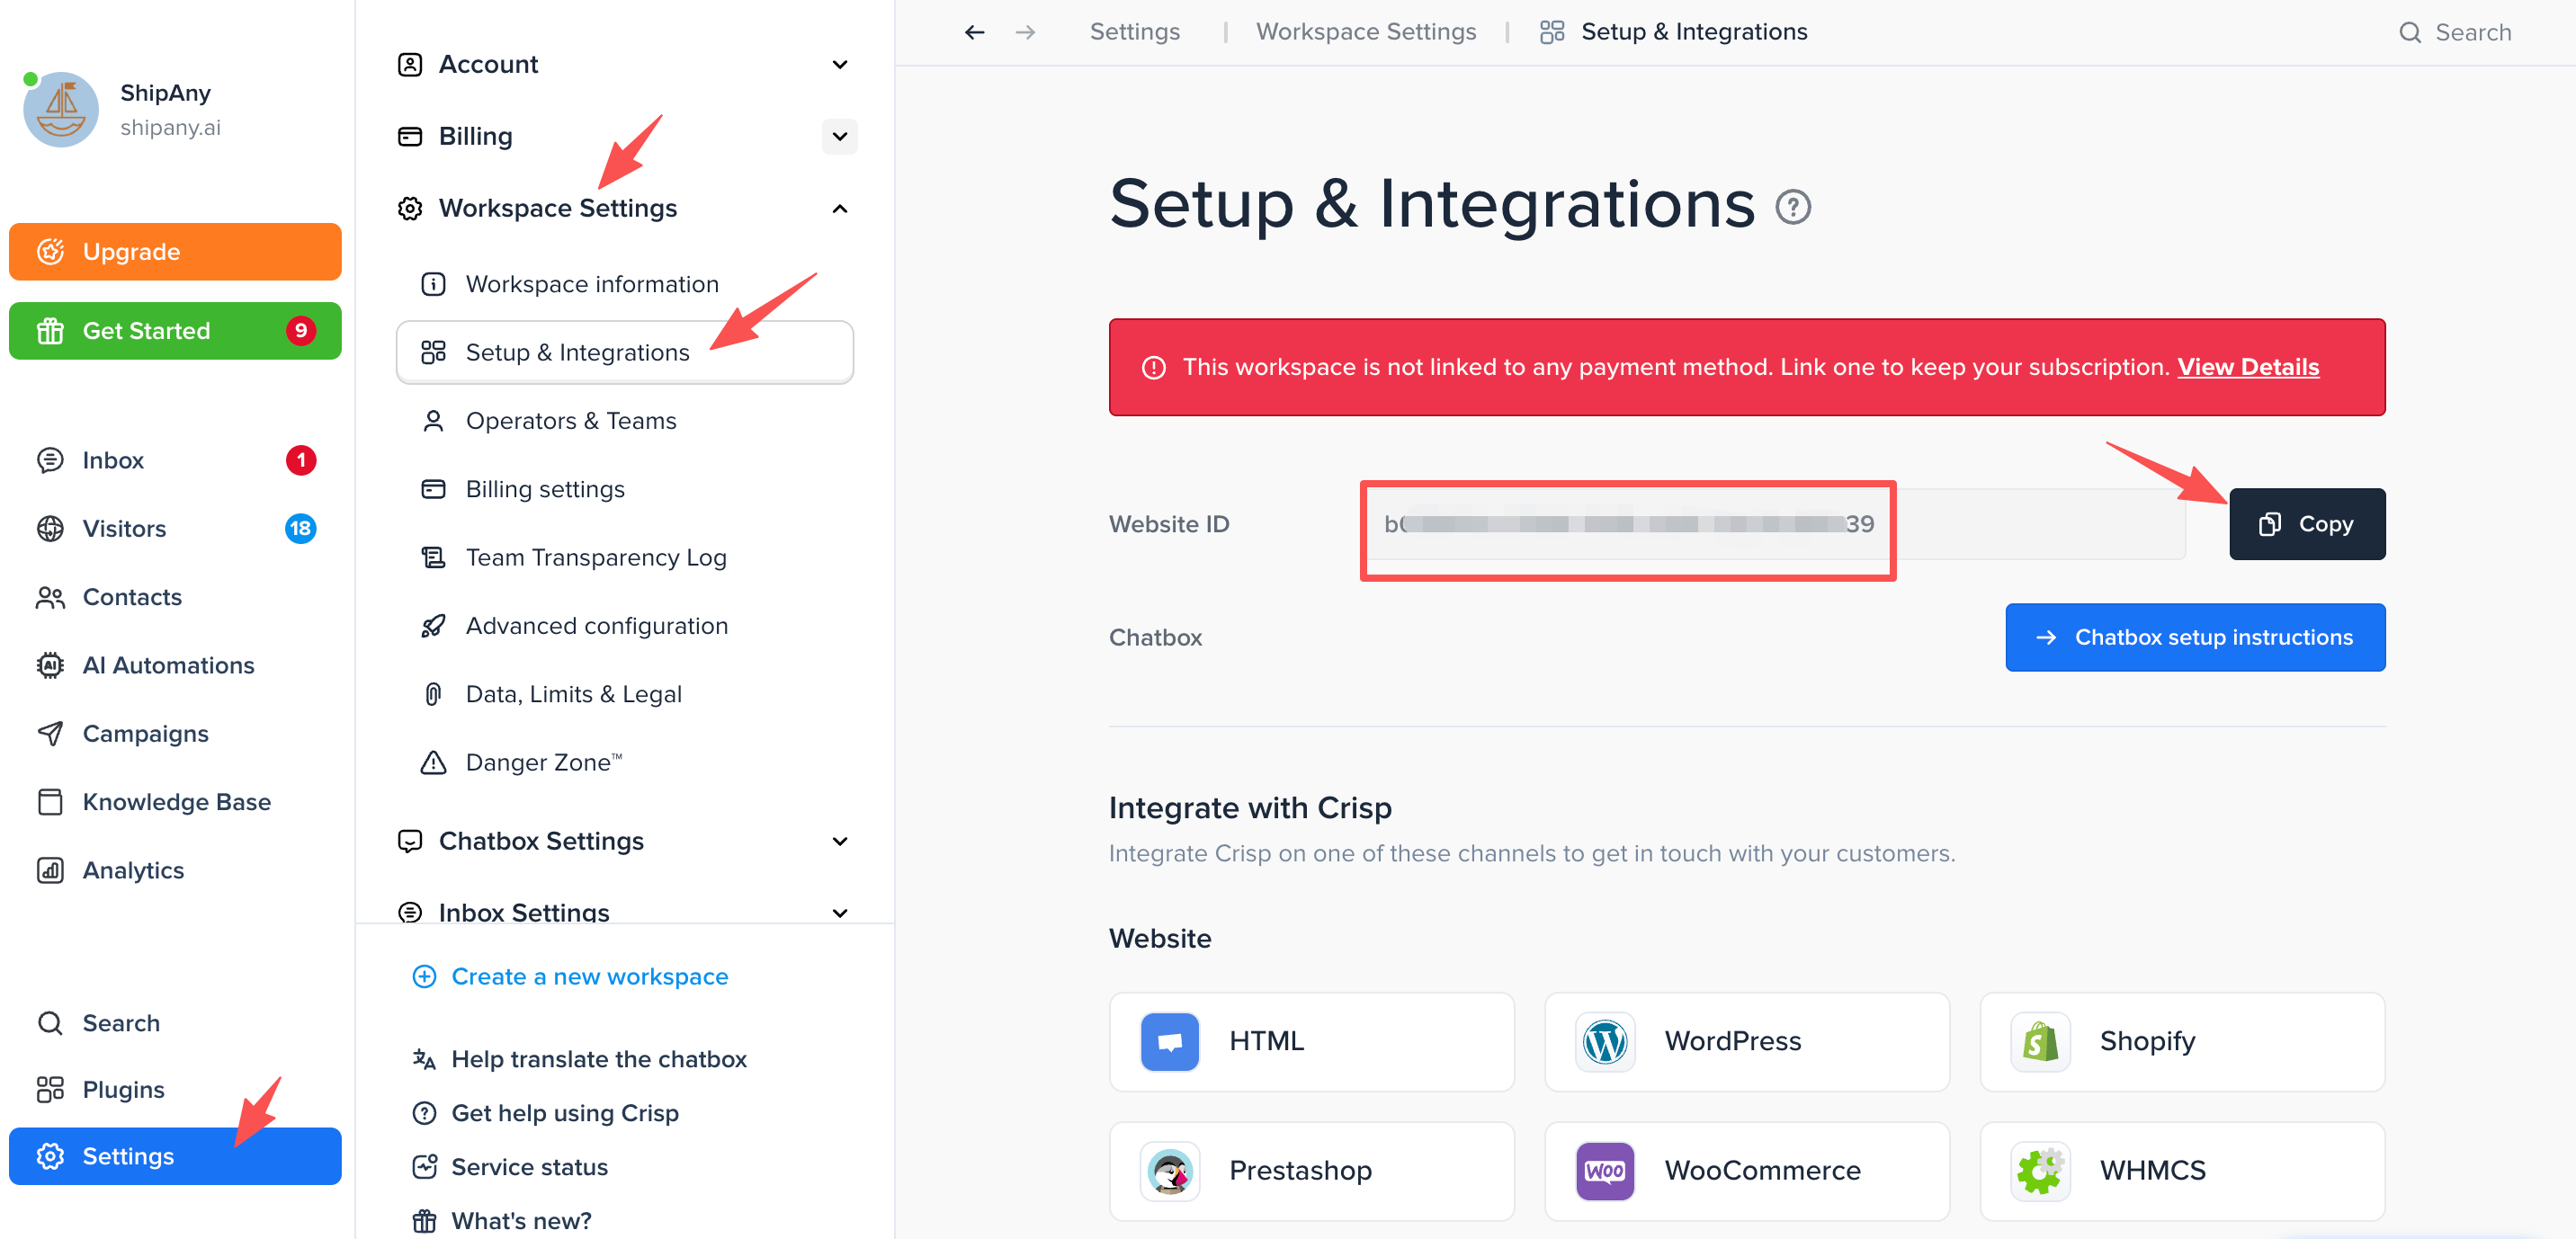
Navigate to Settings -> Workspace Settings -> Setup & Integrations page and copy the Website ID.
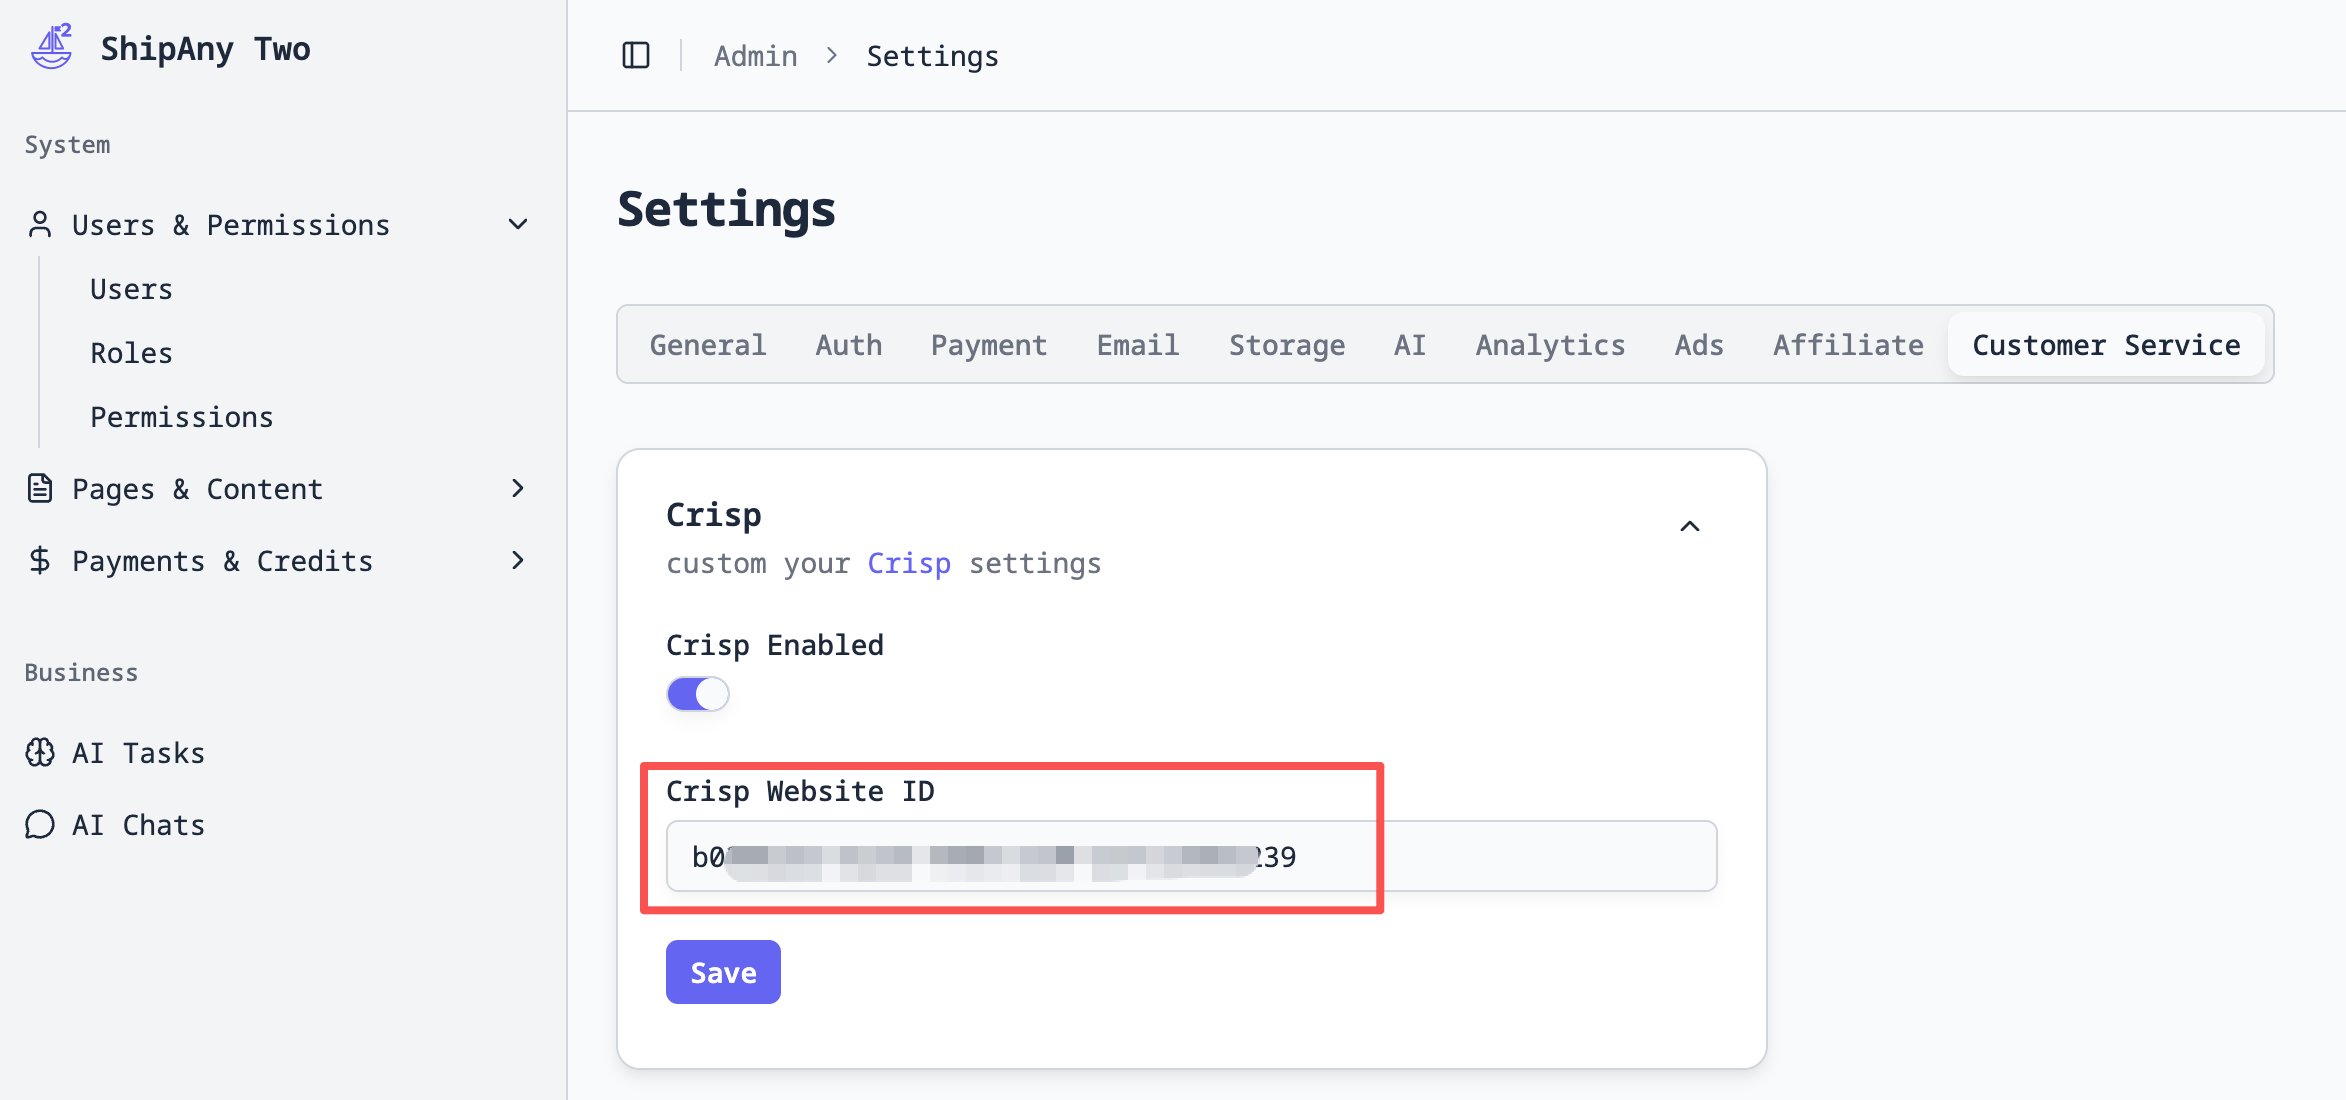
In your project admin panel, go to Settings -> Customer Service -> Crisp panel, and enter the Website ID you copied in the previous step into the Crisp Website ID field.
Enable the Crisp Enabled toggle and click the Save button to save the configuration.
On your project homepage, refresh the page. You should see a customer service icon in the bottom right corner. Click it to open the Crisp chat widget.
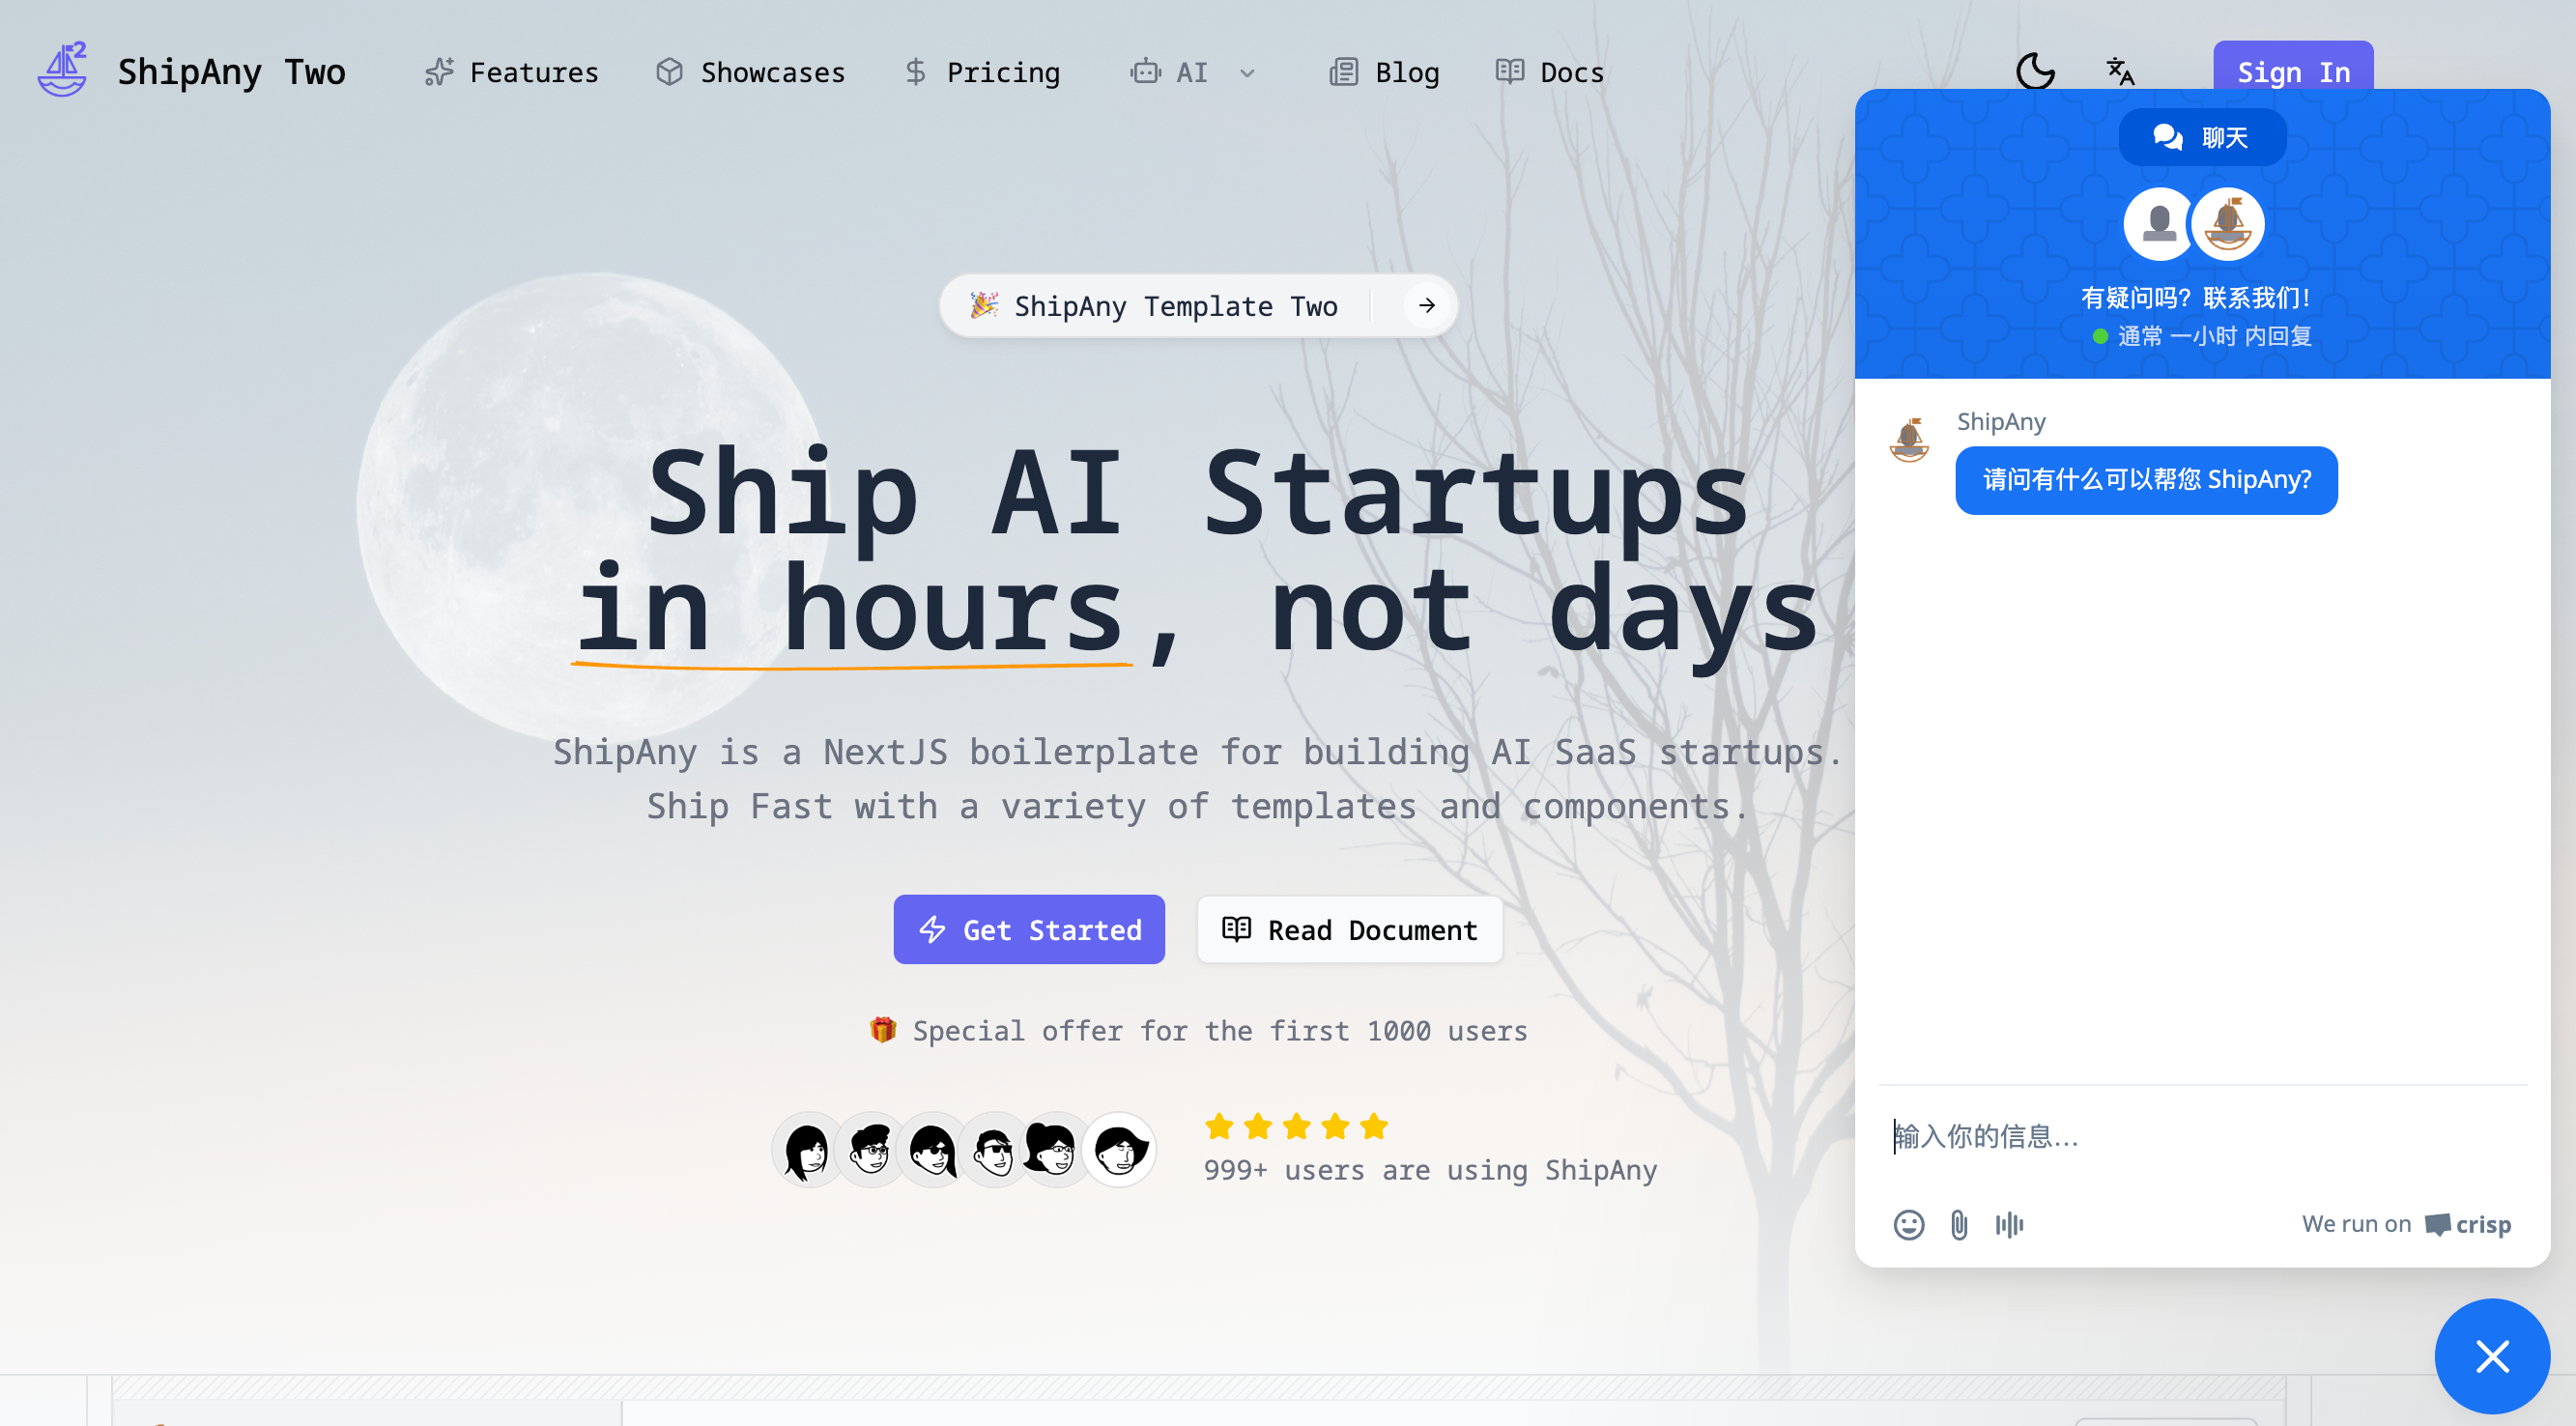
Users can send messages through the chat widget on your website.
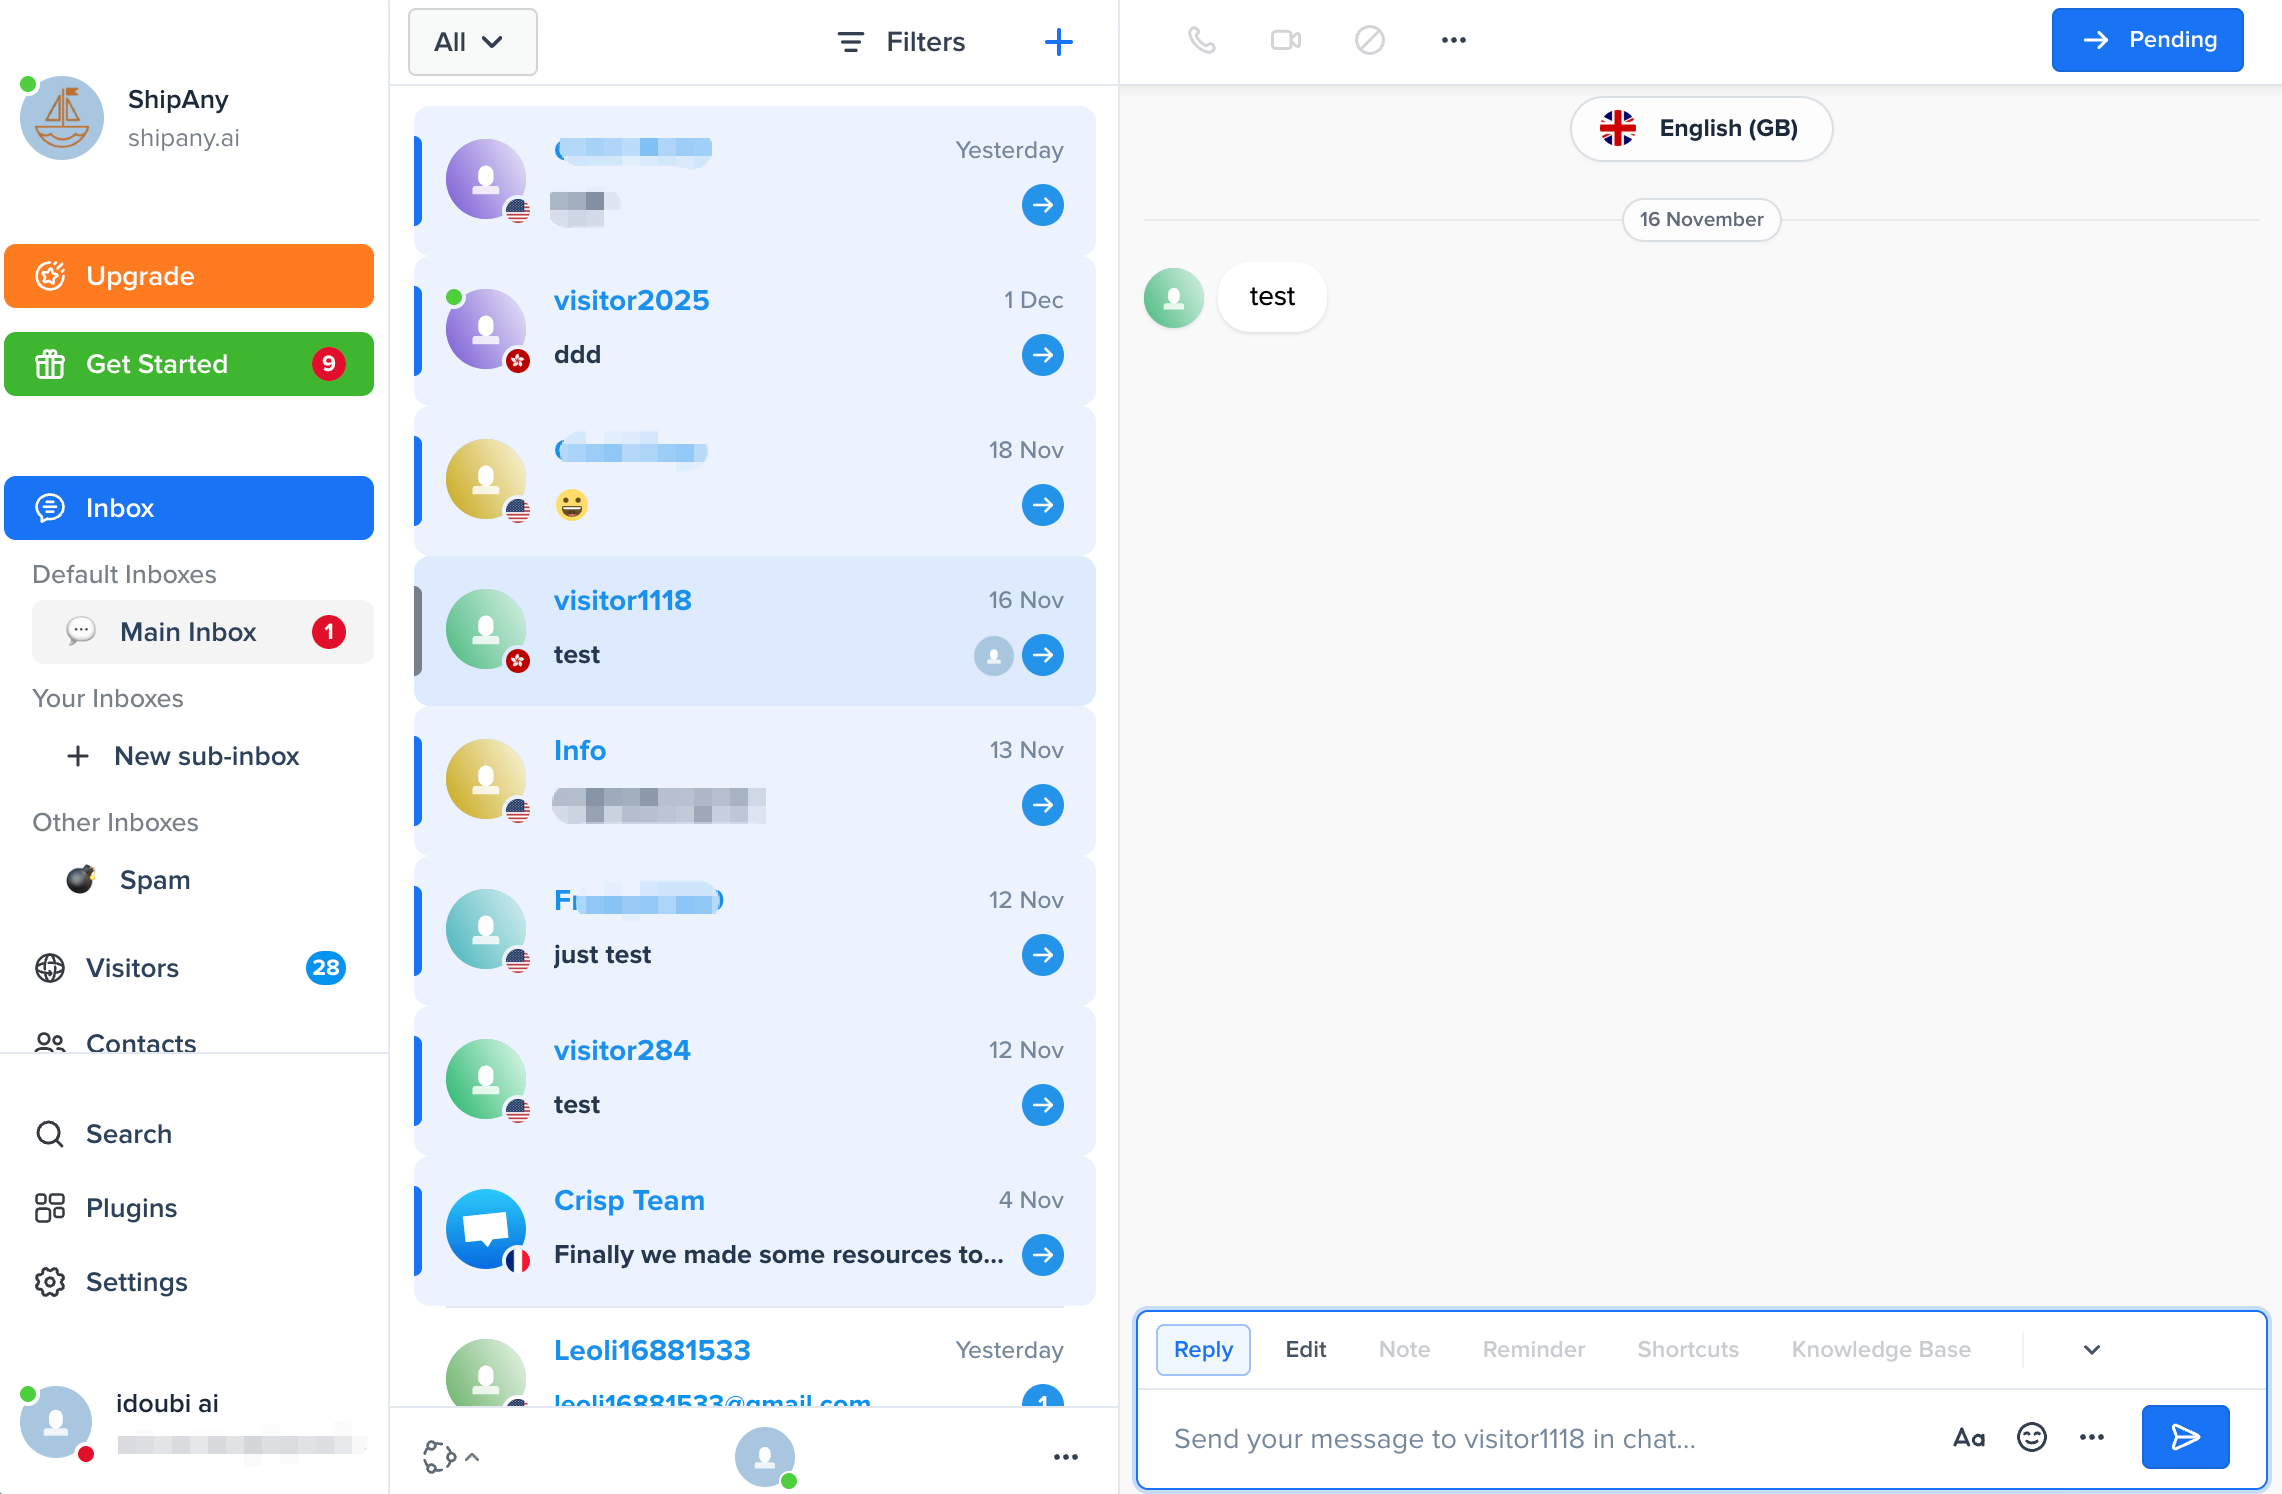
In the Crisp dashboard, go to the Inbox page to view and reply to user messages.